Design a PCR primer that amplifies the selected region of the feature lane.
There are two kinds of settings for the selection area and the position of the designed primer.
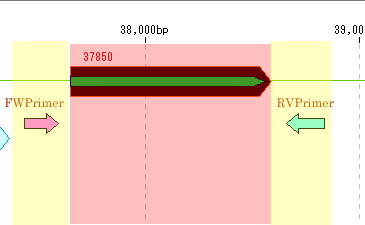
1. Design a forward / reverse primer outside the selected region so that the product base length is as short as possible.
In this case, you can design a range that can be designed outside the selection range (range indicated by yellow), and can not be designed beyond that range.
The default value is 1000 bp and you can change this parameter.
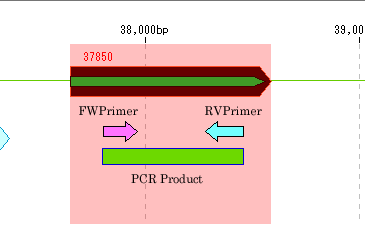
2. Design a forward / reverse primer inside the selected region so that the product base length becomes as long as possible.
In this case, set the minimum product base length, and you can not design short products shorter than that.
The default value is 100 bp, you can change this parameter.
There is also an option to fix the position of the designed primer.
Also, if there are features of a particular feature key, such as a restriction enzyme recognition site, at the primer position, you have the option of designing the primer in a position that does not overlap that feature.
You can set whether to avoid or not to avoid by feature key.
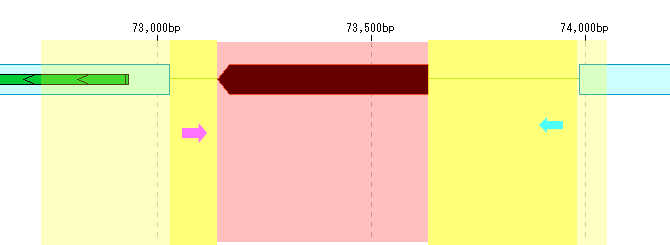
For example, if you design a primer outside the selection area and set the "Avoid features" setting even if the range is a light yellow range, do not design a primer in the overlapping area with the feature.
Operation 1
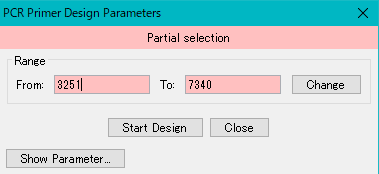
- When changing the selection area (When selecting by dragging, the start / end position may deviate from the desired position.) If there is a selection area, "Partial Selection" is displayed in red at the top of the design dialogue I will.
- From: To in Range field: The start position and the end position of the currently selected area are displayed in red in each input field.
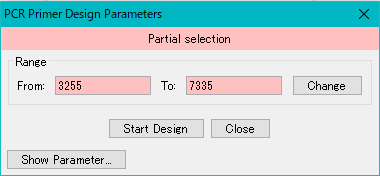
- Enter the genome position directly in the input fields of From and To.

- Click "Change".
- The range of the selected area is changed.
Operation 2
- To design a PCR primer outside the selection area Right-click on the selection area on the selection area.
- The menu will be displayed.
- Select PCR Primer Design from the menu.

- The "PCR Primer Design" execution dialog for the selected area is displayed
- Click "Show Parameter ...".
- The dialog is enlarged and all the execution parameters are displayed.
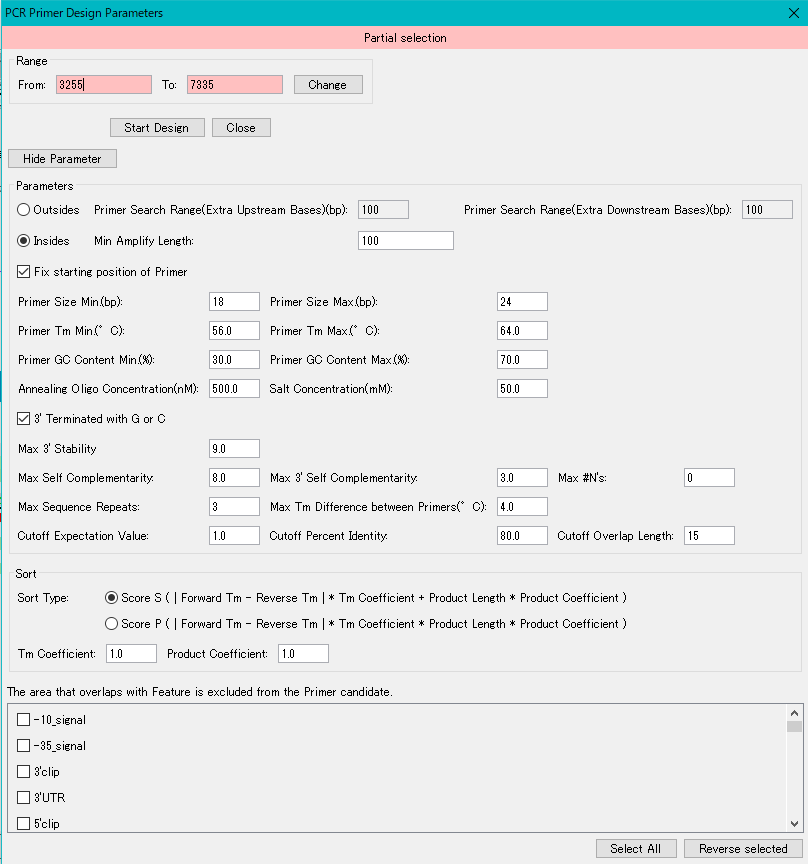
- Turn on the "Outsides" radio button in the "Parameters" column.

- Click "Start Design".
- While running, "Wait!" Progress message is displayed.
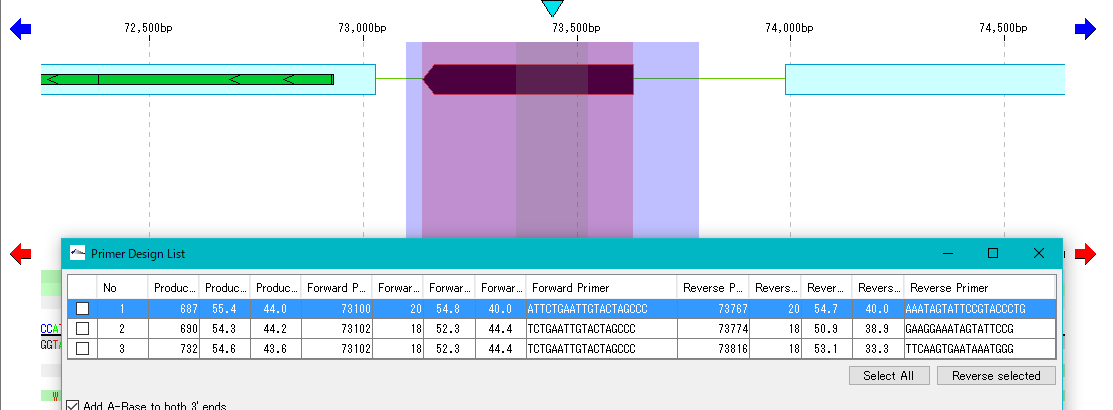
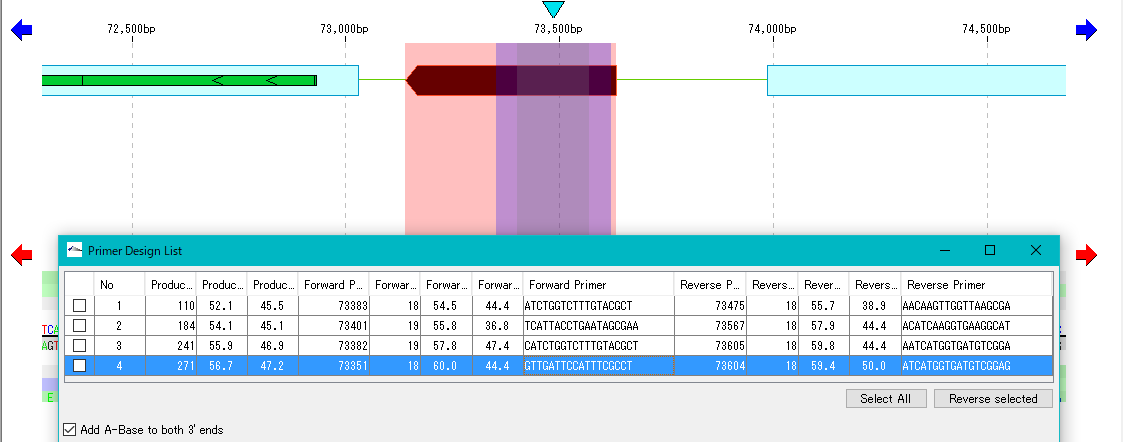
- When execution is completed, the "Primer Design List" dialog will be displayed.

- Click one line in the Primer Design List dialog.
- The region of the PCR product including the selected area of the feature lane is displayed in blue in color.
- Subsequently, processing such as primer registration, PCR execution, registration as a feature, list CSV file output etc is possible.
Operation 3
- When setting PCR primer inside selection area The same as "operation 3" until "Show Parameter" is clicked.
- Turn on the "Insides" radio button in the Parameters column.

- Click "Start Design".
- While running, "Wait!" Progress message is displayed.
- When execution is completed, the "Primer Design List" dialog will be displayed.
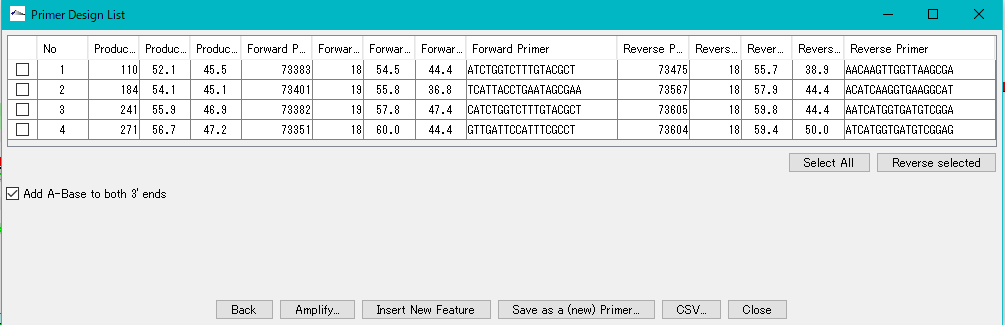
- Click one line in the Primer Design List dialog.
- The area of the PCR product including the selected area of the feature lane is displayed in purple in color.
- Subsequently, processing such as primer registration, PCR execution, registration as a feature, list CSV file output etc is possible.