




The Assembly design method pull-down menu
Use the Assembly method pull-down menu to choose the assembly design method. The following methods are currently supported.
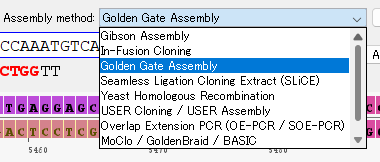
- Gibson Assembly
- In-Fusion Cloning
- Golden Gate Assembly
- Seamless Ligation Cloning Extract (SLiCE)
- Yeast Homologous Recombination
- USER Cloning / USER Assembly
- Overlap Extension PCR (OE-PCR / SOE-PCR)
- MoClo / GoldenBraid / BASIC
- General Cloning PCR (no junction)
Showing the design rule for each assembly method
Clicking the Show Design Rule button displays the Assembly Design Rule table dialog.
Buttons for jumping to a junction
The Prev Junction and Next Junction buttons move to the junction of a provisionally joined fragment. Clicking either one shifts the base sequence so that the previous or next junction is centered in the base sequence lane.
Selecting a primer sequence
Dragging a base sequence on the base sequence lane copies the dragged sequence into the current primer edit field.
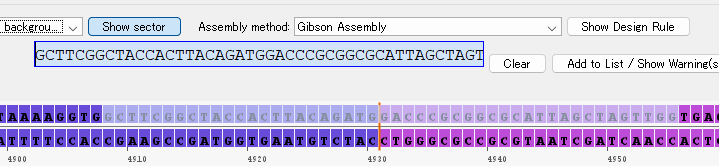
There are two primer edit fields, the forward primer edit field and the reverse primer edit field. To make either one the current primer edit field, click it. The background color of the clicked field then turns light blue for the forward primer edit field, or light yellow for the reverse primer edit field.

Dragging the mouse over any region of the base sequence lane copies that dragged region into the current primer edit field. The complementary sequence is shown below the forward primer edit field.
Operating the primer edit fields
- Clear button: clears the base sequence currently shown in that primer edit field.
- Add to List / Show Warning(s) button: copies the base sequence currently shown in the primer edit field into the primer list table.
Items in the primer list table

- CB: a checkbox for selecting the target of an operation
- Primer ID: an automatically assigned Primer ID
- Method: the Assembly Design Method used
- Primer Sequence: the primer sequence
- Length: the length of the primer sequence
- Tm (C): the Tm of the entire primer
- GC(%): the GC content of the entire primer
- Tm(an): the Tm of the Annealing region
- GC(an): the GC content of the Annealing region
- Date: the date and time the primer was designed
- Comment: a free-text comment field (can be entered/edited directly). If any issue is detected, the corresponding warning message is written here.
- Fragment List: the full path to the fragment file containing the sequence copied in as this primer
Adding a restriction enzyme site to the primer candidate sequence in the current primer edit field
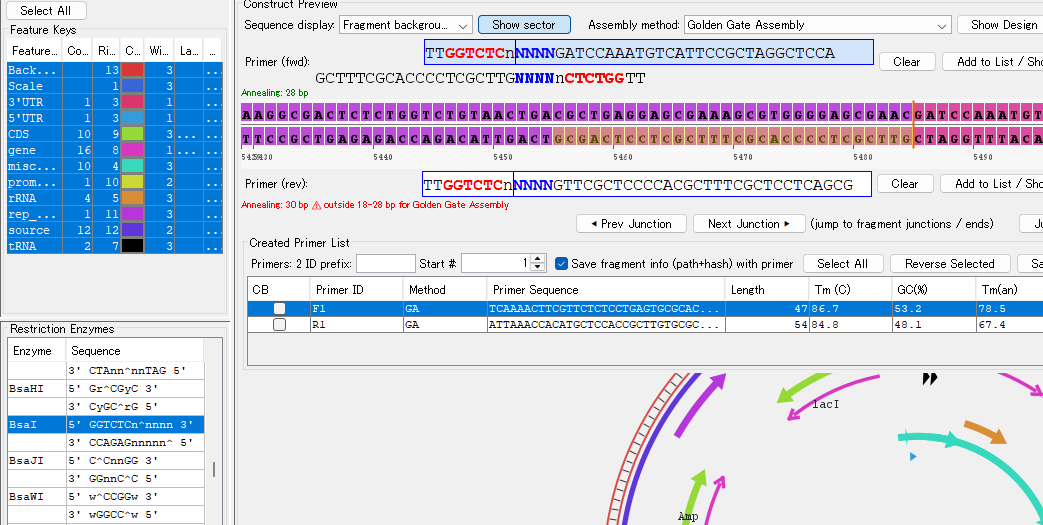
Click to select, in the Restriction Enzyme table, the restriction enzyme to add to the primer candidate sequence. Then click the Add RE site to primer button below the table. This adds the restriction enzyme site to the primer candidate sequence in the current primer edit field.
Adding a Type IIS restriction enzyme site
When Golden Gate Assembly is selected and a Type IIS restriction enzyme is added to the primer candidate sequence, the recognition site cannot be edited manually. Choose one entry from the pre-registered list of 4-base overhangs, and the cut site is replaced with that sequence as the overhang. Bases other than the recognition site and the cut site can be edited directly.
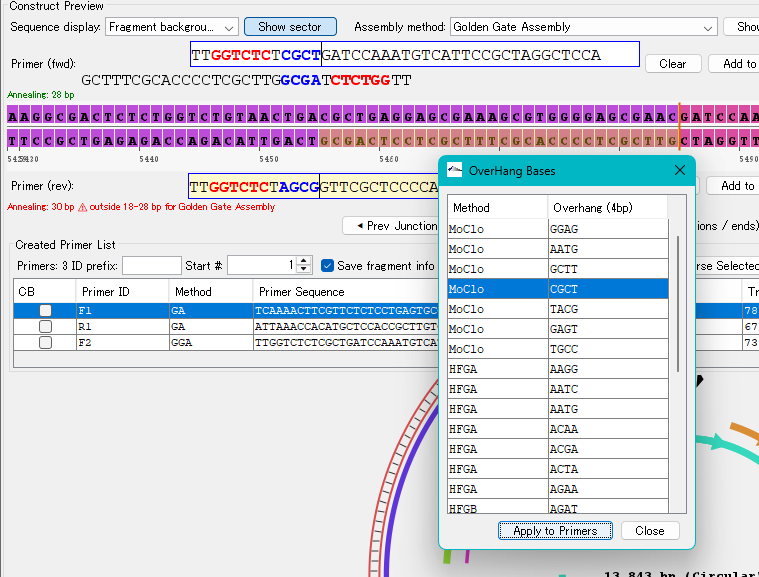
Preview dialog after designing/editing a primer candidate
After designing the forward and reverse primers, you can preview the resulting junction.
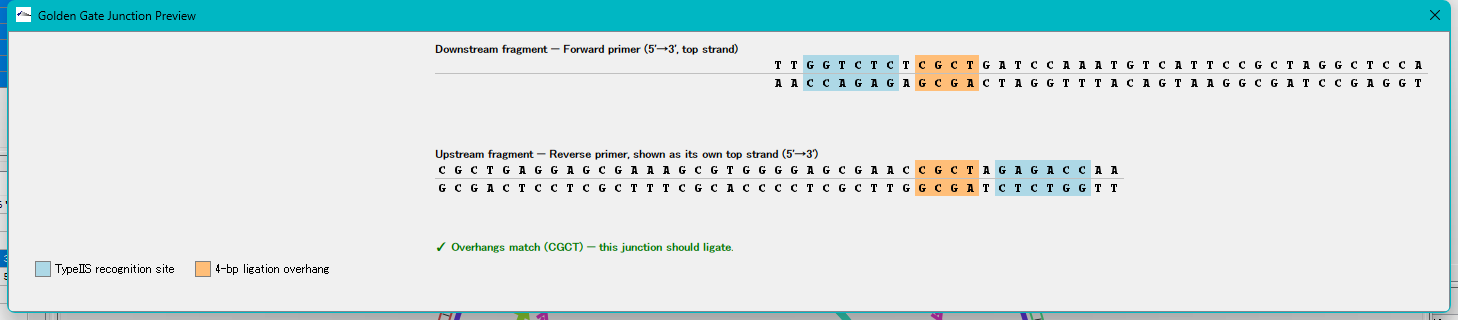
Junction Preview button: clicking it displays the Preview dialog.
Operating the primer list table
The primer list table is a temporary work area. To save its contents permanently, you need to register them to Primer.dat.
How to choose which primers to register to Primer.dat
- Check the checkbox.
- Select All button: selects every primer sequence currently in the primer list.
- Reverse Selected button: inverts the current selection state.
- Save fragment info (path+hash) with primer checkbox: when checked, the full path to the Fragment is attached to each primer's information.
- ID prefix: specifies the filename prefix to use when saving to Primer.dat.
- Start #: specifies the starting number of the sequential number appended to the prefix.
- Save to Primer.dat: saves the selected primer information to Primer.dat.
- Dispose: discards the primer list.