Function Menu
 License Activation
 Function Overviews and Basic Operation
 Work Bench
 Feature Map
- Feature Key and Feature
 Management and Operations of Feature Keys
- Attributes of Feature Keys
- IMC Original Set Feature Keys
- Types and Roles of Qualifiers
- IMC Original Set Qualifiers
- View and Edit Qualifiers
- Feature Position on Genome Sequence
- Feature Fragmentation
- Feature Synthesis
- Feature Fusion
- Feature Operators
- Link and Refer on Feature
- Feature Mapping
- Register, Edit, Delete Feature
- Feature Appearance
- Join and Delete Position
- Feature Categorization and Presentation
- Import Feature
- Export Feature
- Numbering of Feature
 Sequence and Data Input and Output
- Genome / Sequence Viewer / Editor
 GenBank EMBL Viewer
 Sequence Viewer
 Annotation Viewer
- Multiple Genome Viewer (Linear Map)
 Circular Genome Viewer-Designer
 Plasmid Map Viewer-Designer
 Trace Viewer - Editor
- Labeling and Coloring
- Description Window
- Amino Acid Sequence Profile Viewer
- Multiple Alignment Viewer
 Phylogenetic Tree Viewer
- GT Alignment Viewer
- Restriction Enzyme Map Window
 Search Sequence and Annotation
- Cloning
- Sequencing
- Gene and Genome Sequence Analysis
- Genome Annotation
 Genome Comparison
- Multiple Aligment
- Phylogenetic Tree
- Multiple Linear Genome Map
- Gene Cluster Alignment
 Multiple Circular Genome Map
 Dot Plot Analysis
 Venn Diagram Analysis
- Core Genome Analysis
- Global Genome Rearrangement Analysis
- Local Genome Rearrangement Analysis
- Mutation Analysis
- Enzyme Alignment by EC Number
- Unique Region Analysis
- Genome Mapping
- Expression Analysis
- Metabolome Analysis
- Genome Design
 Settings
- Tools
- Window and Dialog Description
- What is "Do It Yourself" Genome Analysis Software?
- Functions and Operations of GenomeTraveler
 Dongle License (HW Key)
 Feature Key Search
 Keyword Search
 Pattern Search
 Priming Site Search
 Batch Homology Search
 Restriction Enzyme
 Primer Design
 PCR Reaction
 Ligation
 Fragment Modification
 DNA Content Analysis
 Codon Analysis
 ORF Analysis
 Database Management
 Reverse Complement
You are here: Home  Search Sequence and Annotation Feature Key Search IMC i02G Batch PCR Primer Design
IMC i02G Batch PCR Primer Design
Design primer sets that amplify all designated features present on the genome sequence.
- It can be designed avoiding the place where specified feature such as repeat site exists.
- In addition to the whole genome, design range on the genome can be specified.
- For the range information of features to be used for designing, use the Feature Key search result file.
You can select the following as the design condition.
- A primer set including a specified base range and designed to the outside
- A primer set designed inside the designated base range
Iterate design can be executed while loosing conditions for nucleotide sequence regions that could not be designed under the previous design conditions.
Operation
- Load the template genomic nucleotide sequence into the current main directory.
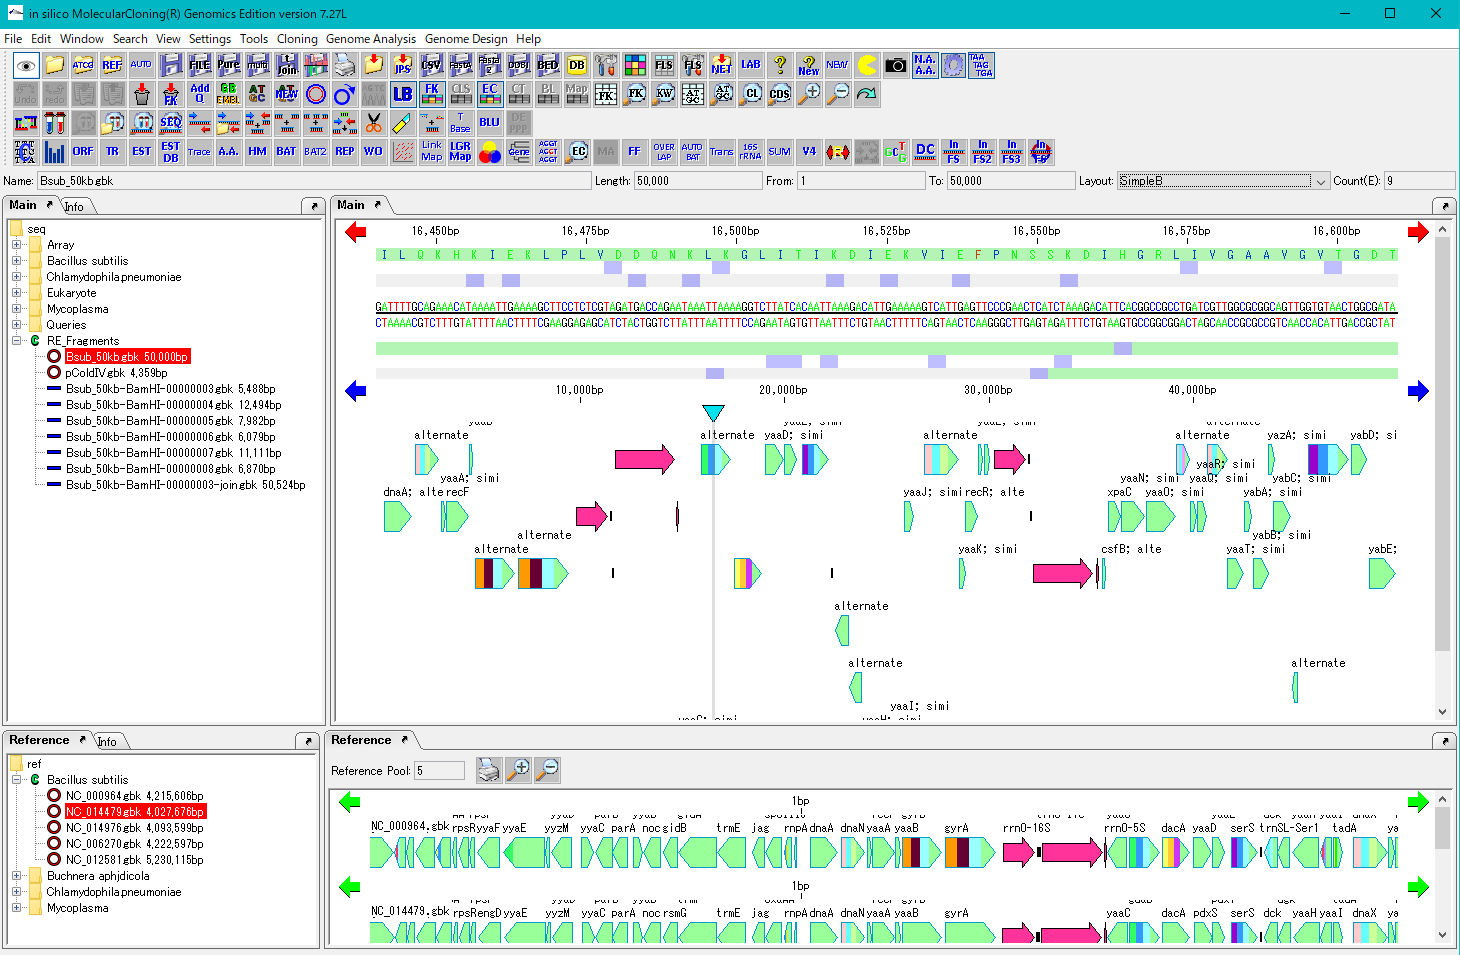
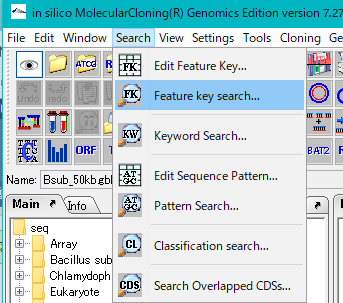
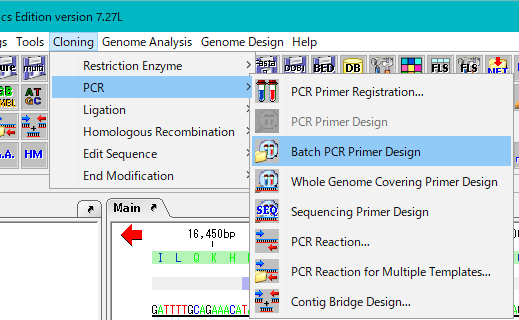
- Select Menu -> Search -> FK Search ....
- The Feature Key Search dialog is displayed.
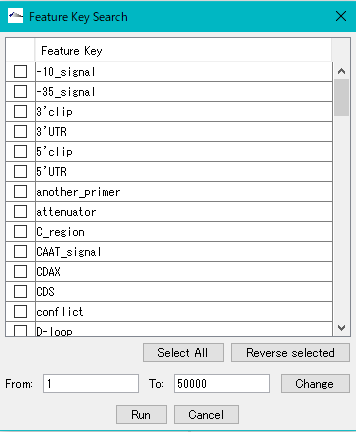
- Check the feature key to specify the range to be amplified and specify it.
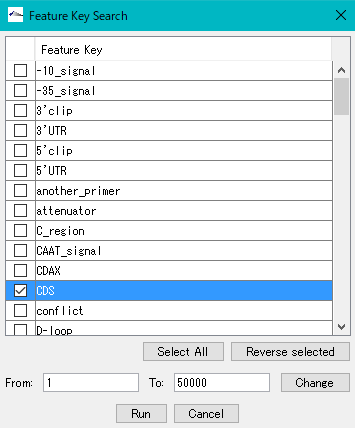
- Multiple designation is possible, but it is desirable to choose only one kind.
- If you want to target only features within a genome, specify the range in which the target feature exists in From To.
- By default, the whole genome range is specified.
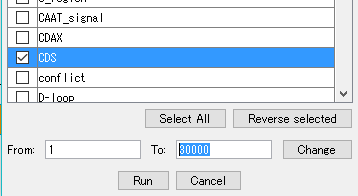
- If you changed the range, click Change.
- Partial Selection is displayed at the top of the Feature Key Search dialog, indicating that partial selection is in progress.
- At the same time, the area corresponding to the feature lane of the main feature map is also displayed as the selection area.
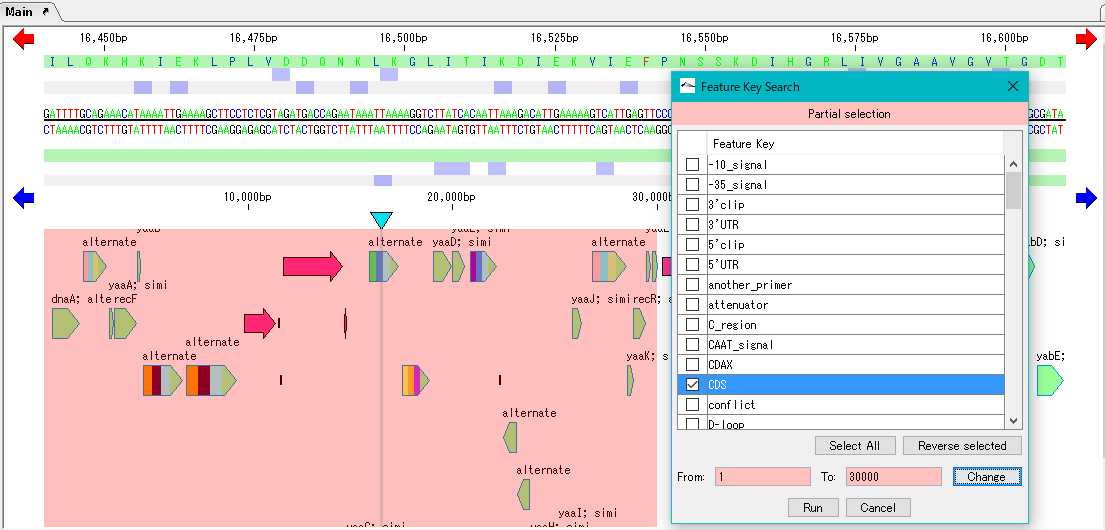
- Click Run.
- The Feature Key Search Result window is displayed.
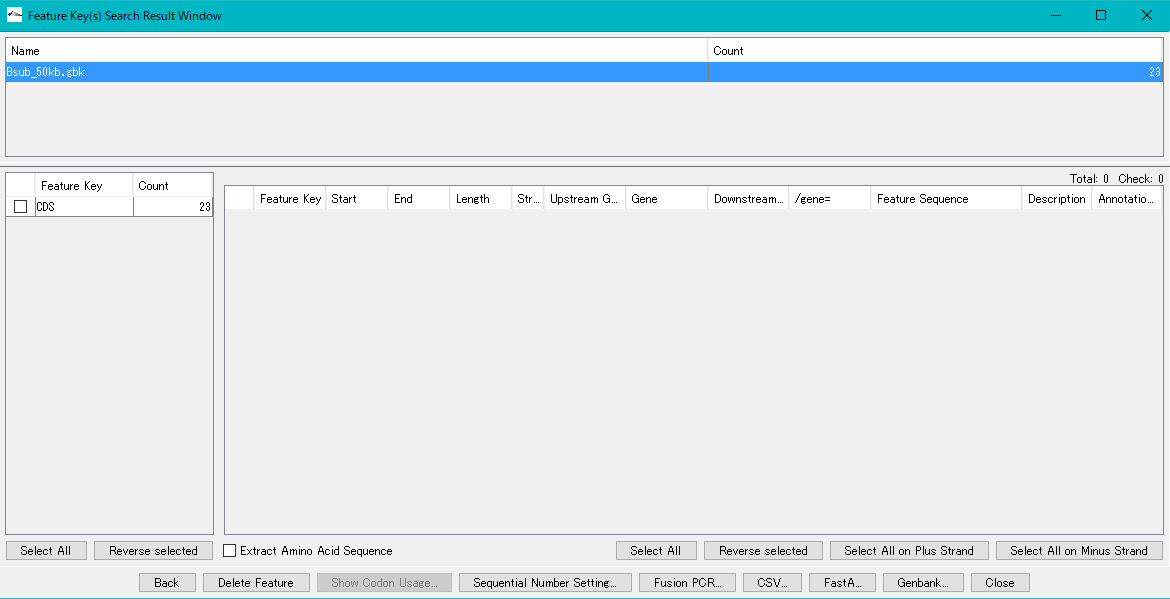
- Check the target feature.
- A list of individual features is displayed in the right pane of the window.
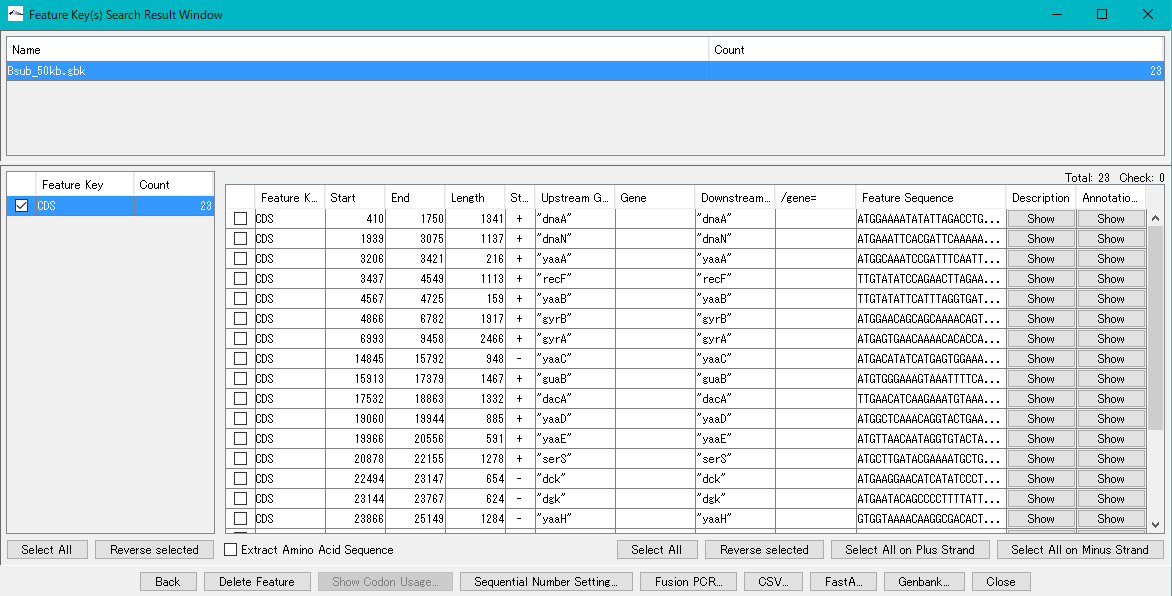
- Click Select All.
- All features are selected.
- Please refer to FK Search for detailed operation method of Feature Key Search Result window.
- After selecting, click CSV.
- The Save File dialog will be displayed.
- Save the CSV file with an arbitrary name.
- Close the Feature Key Search window.
- The preparation is over.
- Select Menu -> Cloning -> PCR -> Batch Primer Design.
- The Batch PCR Primer Design dialog is displayed.
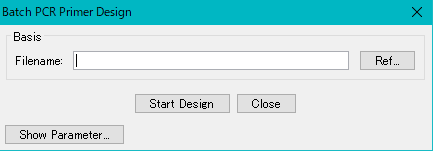
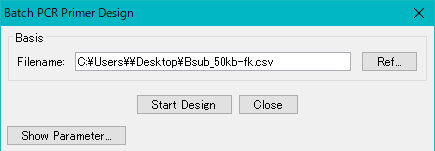
- Click Ref ... to specify the CSV file created by Feature Key Search.
- Click Show Parameter.
- In this section, we will explain only the parameter settings important for bulk design. Parameter setting will be displayed.
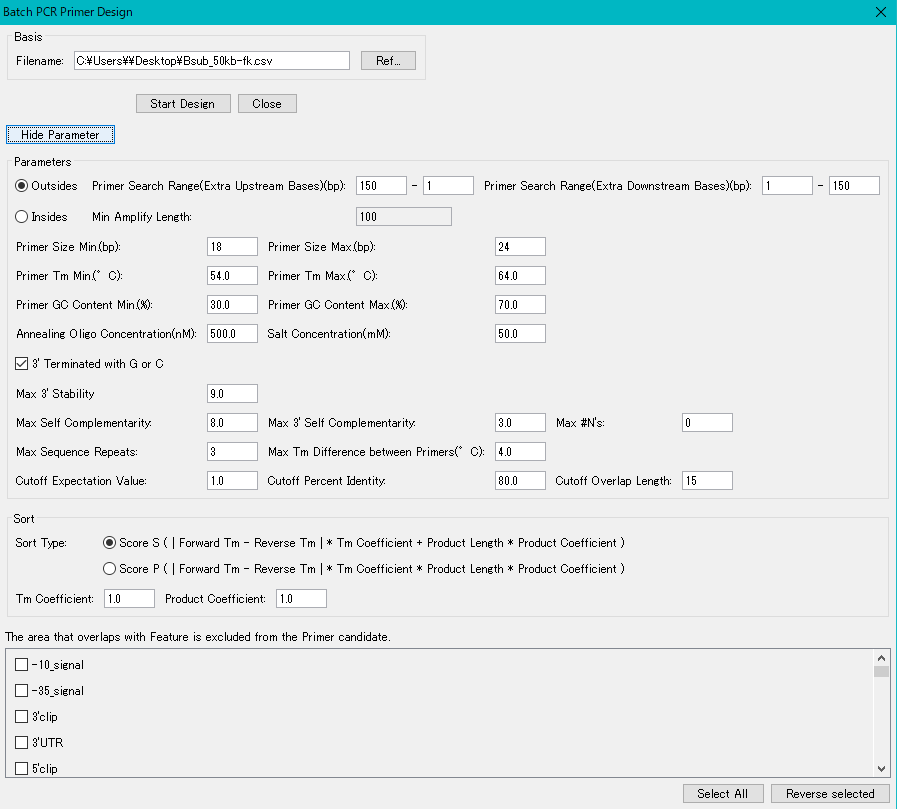
- To design outside, click the Outside radio button.
- When designing it outside, designate the designable range by counting the number of bases on the upstream side with the nearest base outside each feature being 1.
- For example, if you want to design the Forward Primer in the range from 200 bases upstream to the 101 bases position of the feature, set the Primer Design Range (Extra Upstream Bases) to 200 and 101.
- Likewise for Reverse Primer, set Primer Design Range (Extra Downstream Bases) to 101 and 200.
- Click the Inside radio button to design it inside.
- When designing it inside, set the minimum amplification base length (Min. Amplify Length).
- Click Hide Parameter.
- The Parameter description part closes.
- Click Start Design.
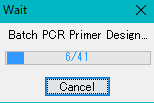
- Processing time is required when targeting the entire genome.
- A progress message is displayed during design process execution
- When execution is completed, the Primer Design List dialog box will be displayed.
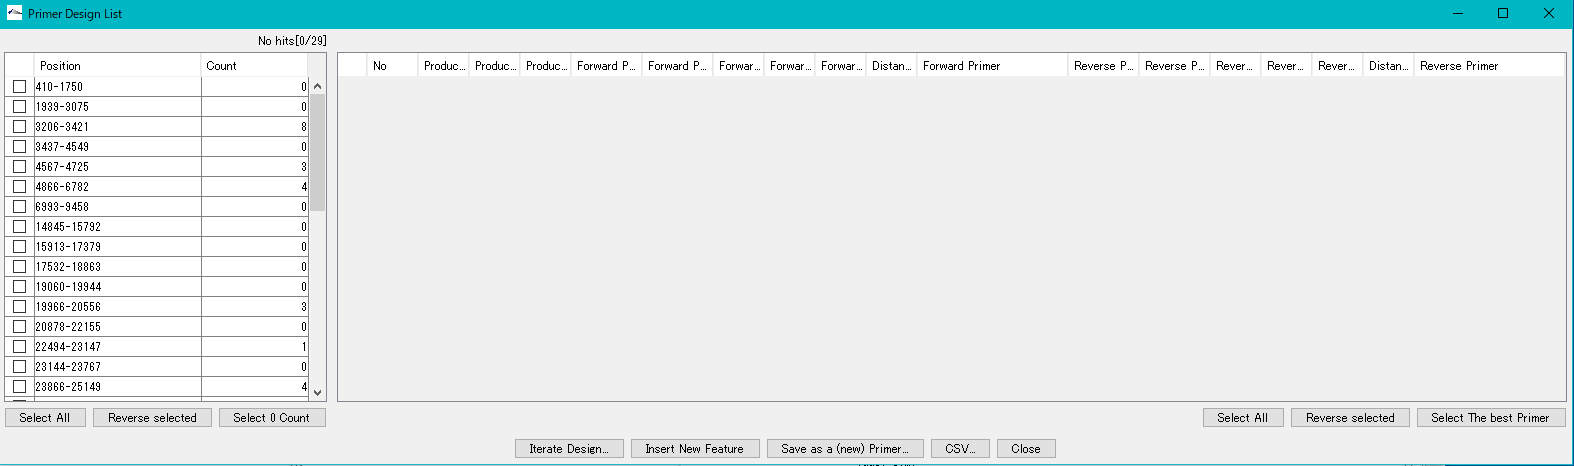
- The number of primer pairs designed for each feature's position is displayed on the left panel.
- For the position where the count is 0, it means that the primer set could not be designed under the given design conditions.
- Check the line whose count is not 0 out of the design position (feature position) of the left panel.
- The list of primer pairs designed for the selected line (corresponding to the feature position) will be displayed in the count number
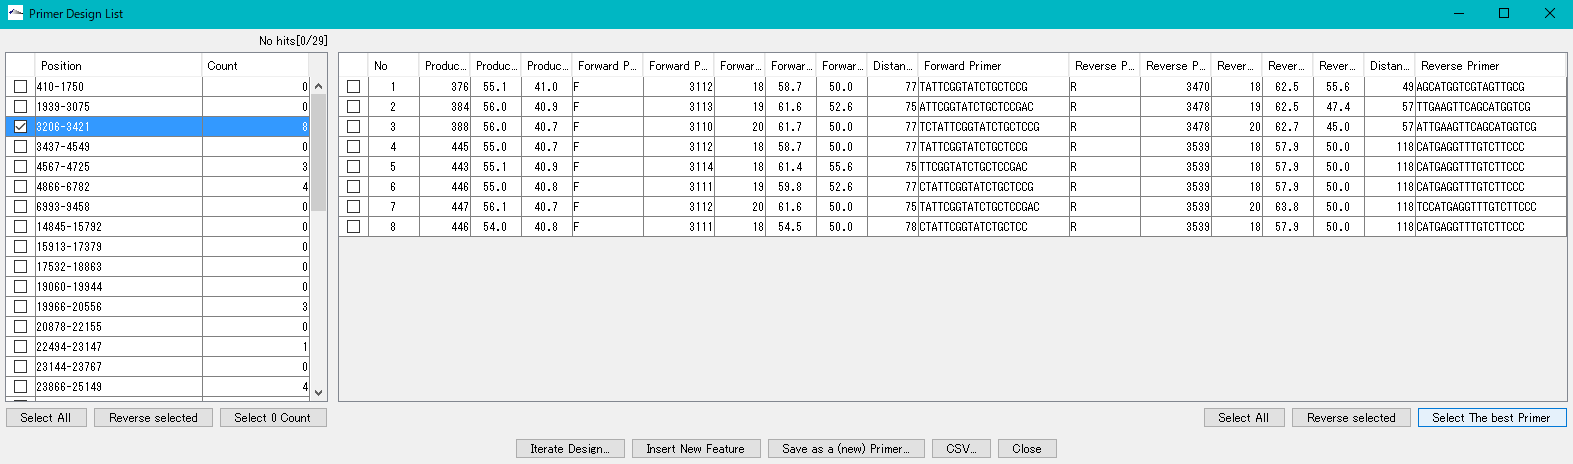
- Click the Select the Best Primer Pair in the lower right.
- The best primer pair is checked.
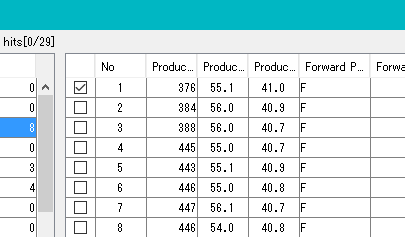
- If multiple lines are checked on the left panel, the optimal primer pair is selected for each checked line.
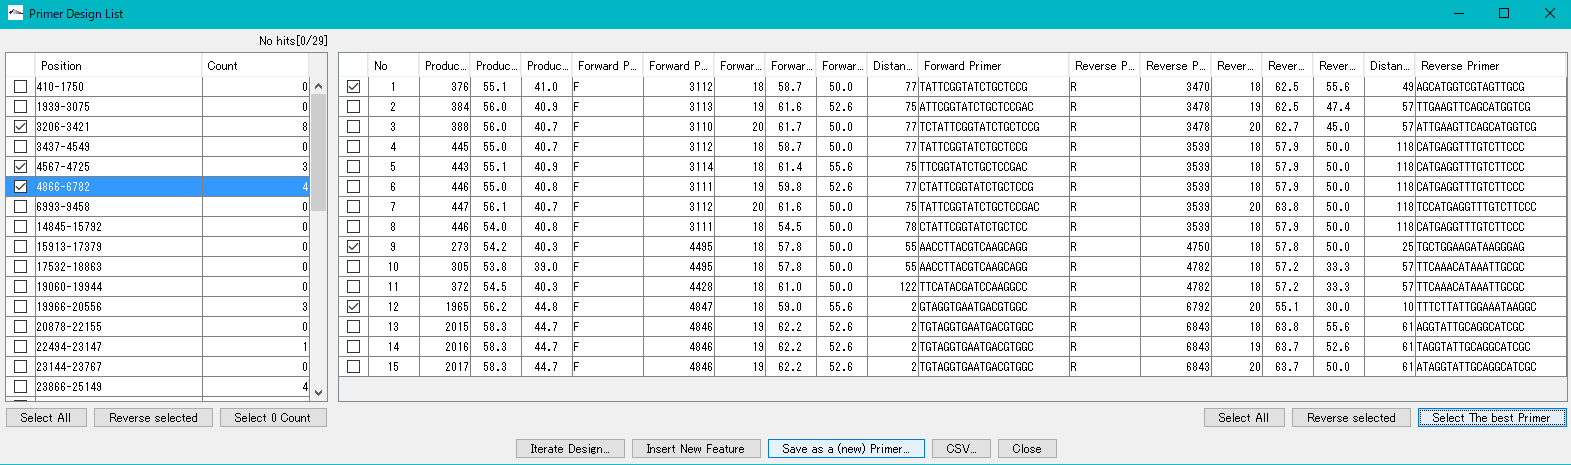
- Click Save as a (New) Primer.
- The checked primer pair is registered in the My primer set. Click on CSV ..
- The checked primer pair is output as a CSV format file.
- Click Insert New Feature.
- The priming site of the checked primer pair is registered in the current feature map as a new feature Primer.