Function Menu
 License Activation
 Function Overviews and Basic Operation
 Work Bench
 Feature Map
- Feature Key and Feature
 Management and Operations of Feature Keys
- Attributes of Feature Keys
- IMC Original Set Feature Keys
- Types and Roles of Qualifiers
- IMC Original Set Qualifiers
- View and Edit Qualifiers
- Feature Position on Genome Sequence
- Feature Fragmentation
- Feature Synthesis
- Feature Fusion
- Feature Operators
- Link and Refer on Feature
- Feature Mapping
- Register, Edit, Delete Feature
- Feature Appearance
- Join and Delete Position
- Feature Categorization and Presentation
- Import Feature
- Export Feature
- Numbering of Feature
 Sequence and Data Input and Output
- Genome / Sequence Viewer / Editor
 GenBank EMBL Viewer
 Sequence Viewer
 Annotation Viewer
- Multiple Genome Viewer (Linear Map)
 Circular Genome Viewer-Designer
 Plasmid Map Viewer-Designer
 Trace Viewer - Editor
- Labeling and Coloring
- Description Window
- Amino Acid Sequence Profile Viewer
- Multiple Alignment Viewer
 Phylogenetic Tree Viewer
- GT Alignment Viewer
- Restriction Enzyme Map Window
 Search Sequence and Annotation
- Cloning
- Sequencing
- Gene and Genome Sequence Analysis
- Genome Annotation
 Genome Comparison
- Multiple Aligment
- Phylogenetic Tree
- Multiple Linear Genome Map
- Gene Cluster Alignment
 Multiple Circular Genome Map
 Dot Plot Analysis
 Venn Diagram Analysis
- Core Genome Analysis
- Global Genome Rearrangement Analysis
- Local Genome Rearrangement Analysis
- Mutation Analysis
- Enzyme Alignment by EC Number
- Unique Region Analysis
- Genome Mapping
- Expression Analysis
- Metabolome Analysis
- Genome Design
 Settings
- Tools
- Window and Dialog Description
- What is "Do It Yourself" Genome Analysis Software?
- Functions and Operations of GenomeTraveler
 Dongle License (HW Key)
 Feature Key Search
 Keyword Search
 Pattern Search
 Priming Site Search
 Batch Homology Search
 Restriction Enzyme
 Primer Design
 PCR Reaction
 Ligation
 Fragment Modification
 DNA Content Analysis
 Codon Analysis
 ORF Analysis
 Database Management
 Reverse Complement
You are here: Home  Cloning Restriction Enzyme IMC F06F Draw a plasmid map with restriction enzyme fragments inserted
IMC F06F Draw a plasmid map with restriction enzyme fragments inserted
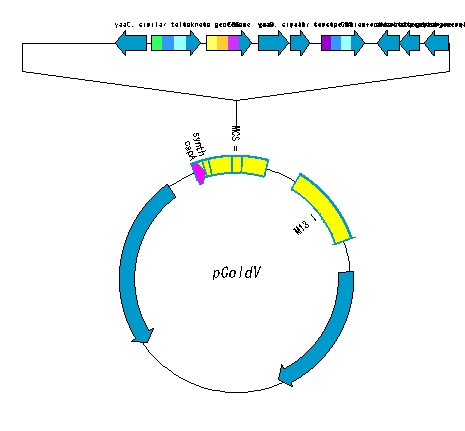
This section explains how to draw a plasmid map of a plasmid into which a restriction enzyme fragment has been inserted.
High-level steps
- The circular plasmid is opened with a restriction enzyme.
- Make a fragment of DNA digested with the same restriction enzymes.
- Ligation is performed.
- Draw a plasmid map of the ligation product.
- Adjust the plasmid map.
Detailed operation procedure
The circular plasmid is opened with one restriction enzyme.
- Select Cloning -> Restriction Enzyme -> Enzyme Selection… from the menu.
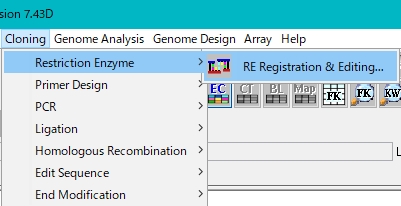
- The Enzyme Selection dialog is displayed.
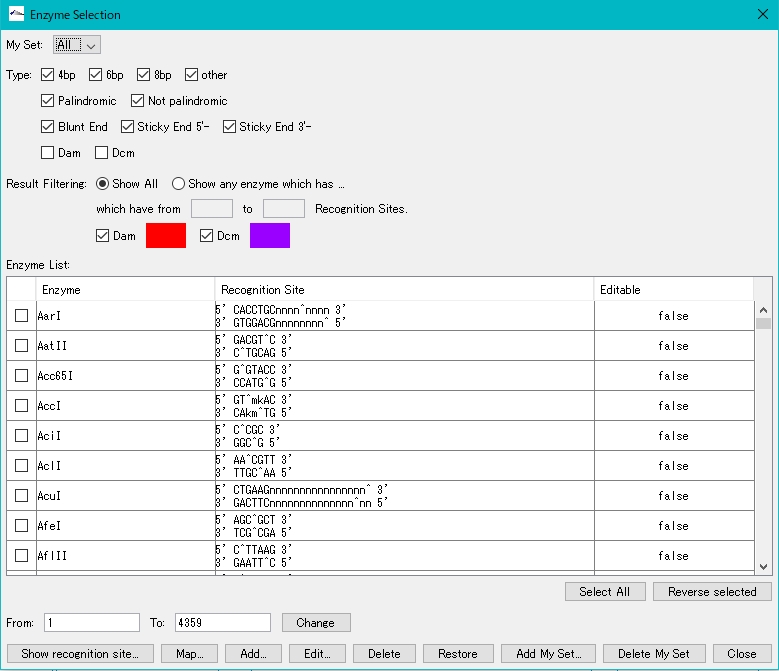
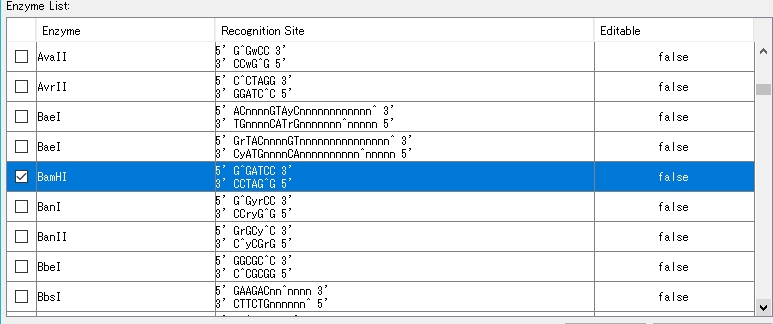
- Select a restriction enzyme. Check BamHI as an example here.
- Click "Show Recognition Site...".
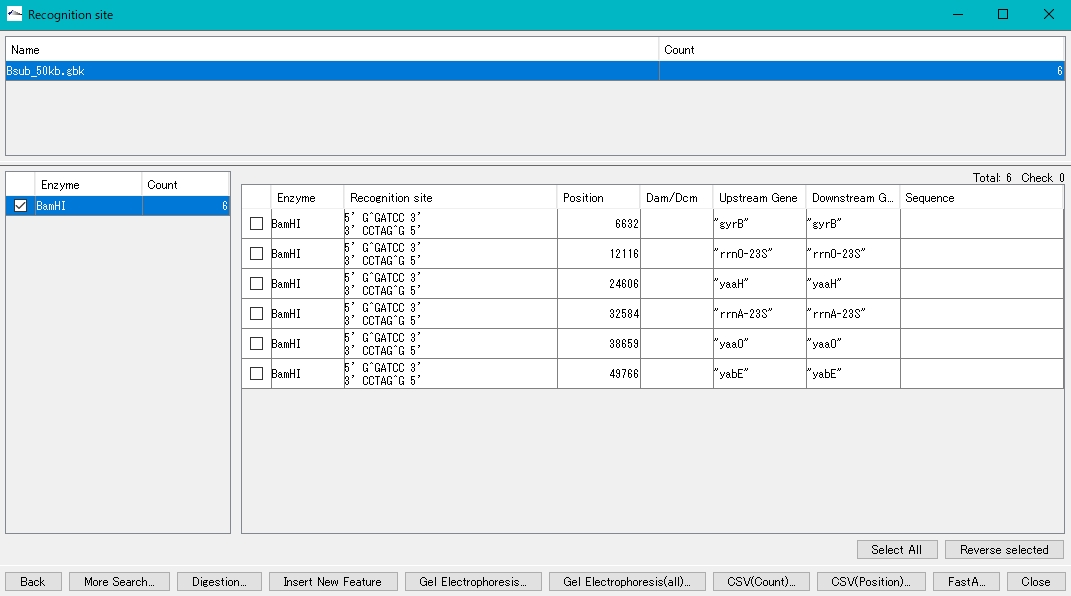
- The Recognition Site dialog is displayed.

- The number of recognition sites for the restriction enzyme BamHI is displayed in the left pane.
- Check the BamHI check box.
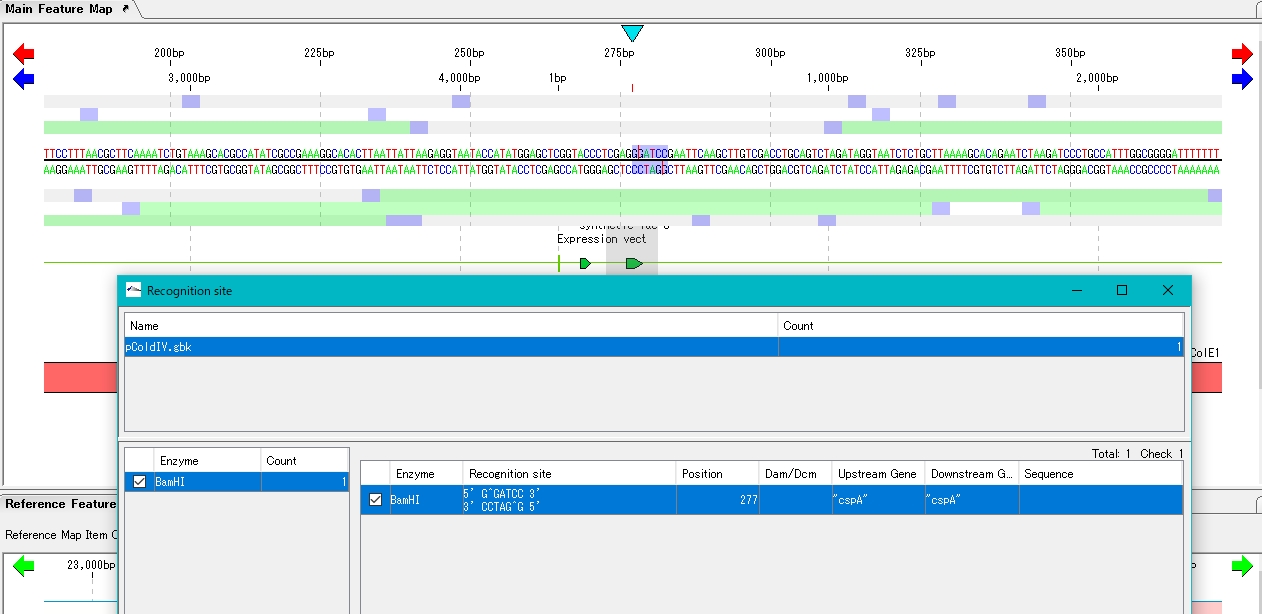
- The BamHI recognition sequence, cleavage site, base position, etc. are displayed in the right pane.
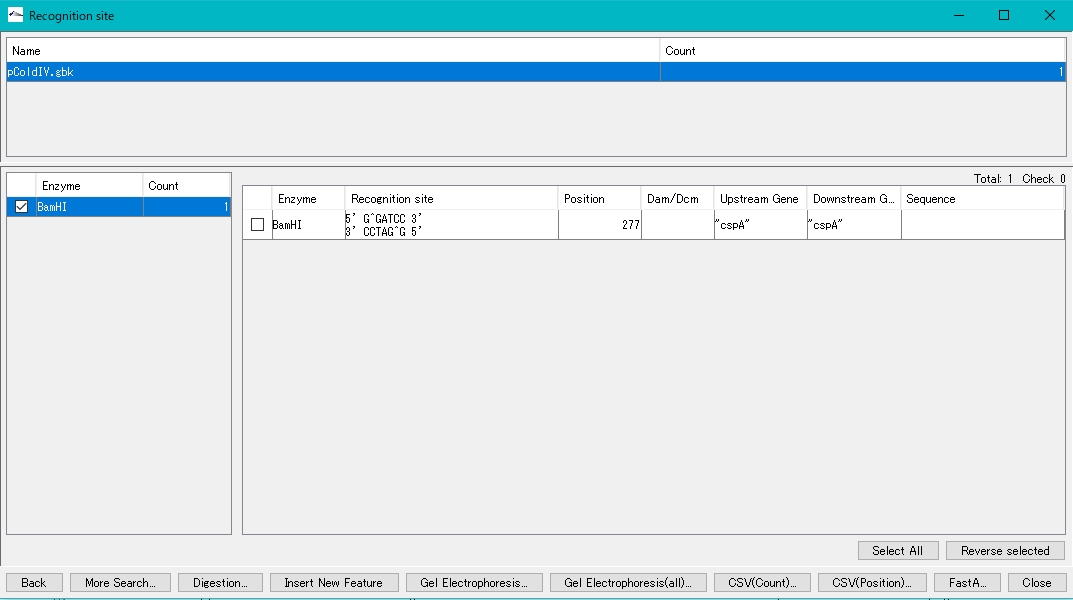
- Check the cutting site in the right pane (multiple selections are possible) to digest and cut at this site.
- The location is displayed in the sequence lane and feature lane of the main feature map.
- Click Digestion. A confirmation message is displayed.
- Click Yes (y).
- The Digestion List dialog is displayed.
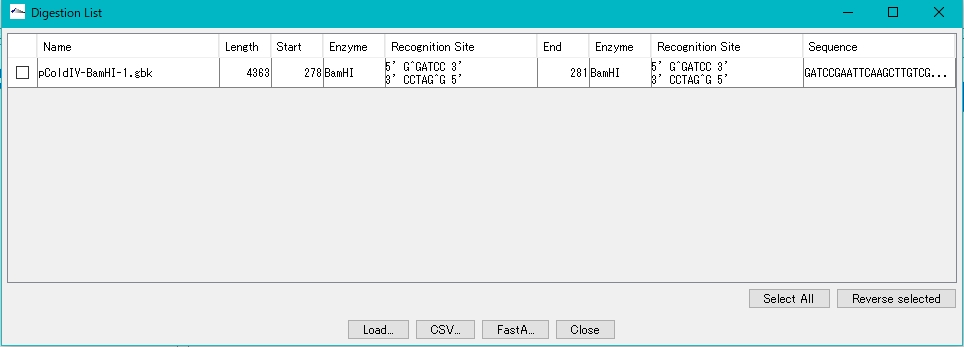
- Check the digested fragments in the Digestion List (multiple specifications are possible).
- Click Load.
- A confirmation message is displayed.
- Click OK.
- The digested fragments are loaded in the main directory.
- The circular plasmid has been opened to give a linear plasmid.
- Close the Digestion List.
- Close the Recognition Site dialog.
Next, create the DNA fragment that will be inserted into the plasmid.
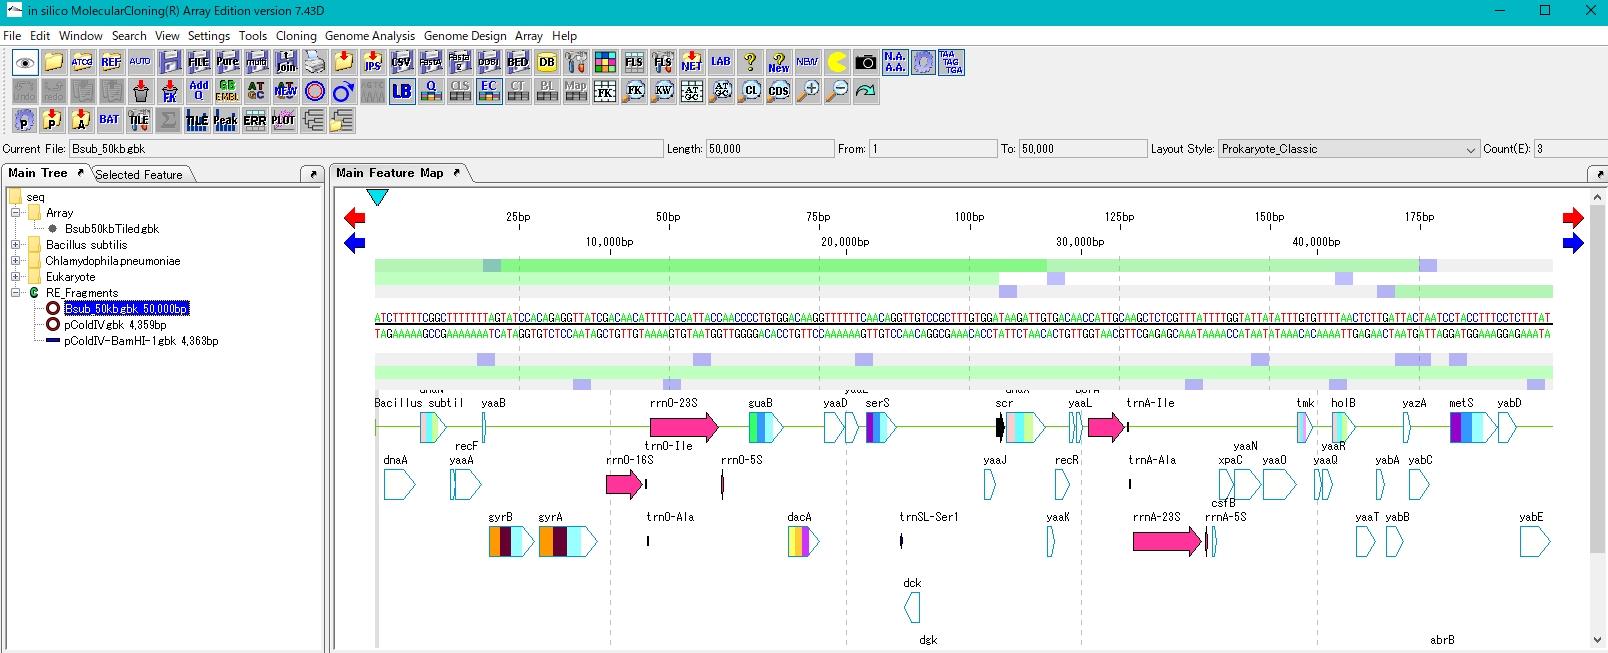
- Load the genomic sequence to obtain DNA fragment.
- As an example, load Bsub_50kb.gbk.
- Like the plasmid, it is digested with the restriction enzyme BamHI. Bsub_50kb.gbk has 6 BamHI recognition sites.
- The procedure is the same as that for opening the plasmid.
- Click Select All.
- All recognition sites will be checked.
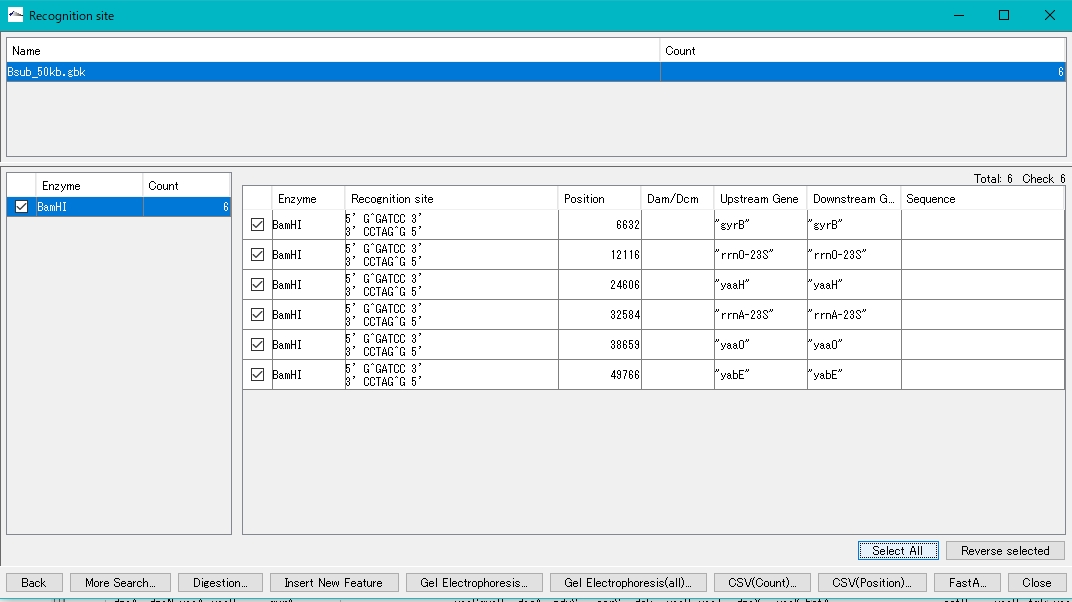
- Click Digestion.
- A confirmation message is displayed.
- Click Yes.
- The Digestion List dialog is displayed. Click Select All.
- Click Load.
- A confirmation message is displayed.
- Click OK.
- All linear digests are loaded in the main directory.
Next, ligation of the opened plasmid and the genomic digestion fragment is performed.
- Select the opened plasmid.
- The feature map is displayed.
- Click Cloning -> Ligation -> Simple Ligation from the menu.
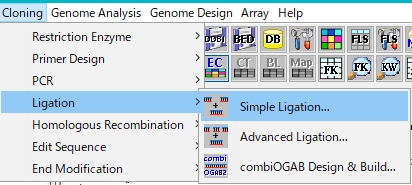
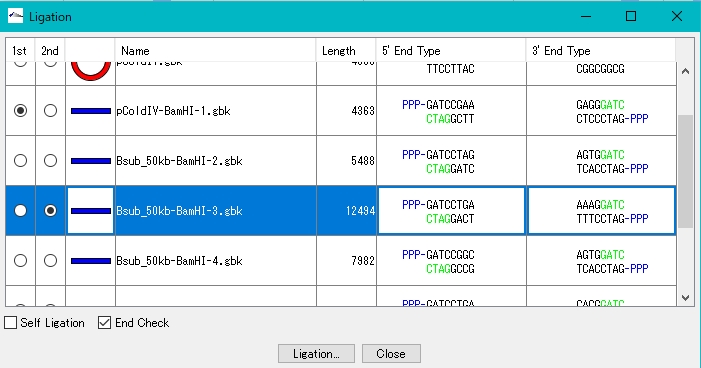
- The Ligation dialog is displayed, showing a list of fragments that can be ligated.
- Turn on the 1st radio button of pColdV-BamHI-1.gbk.
- Turn on one of the 2nd radio buttons in Bsub_50kb-BamHI-n.gbk. Click Ligation.
- A confirmation message is displayed.
- Click Yes.
- The Ligation List dialog is displayed.
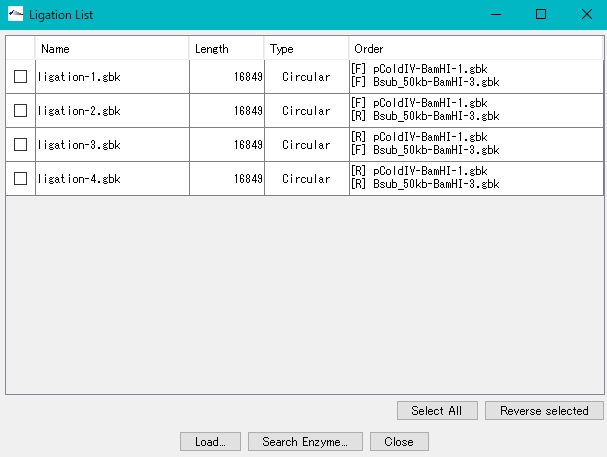
- Click Select All.
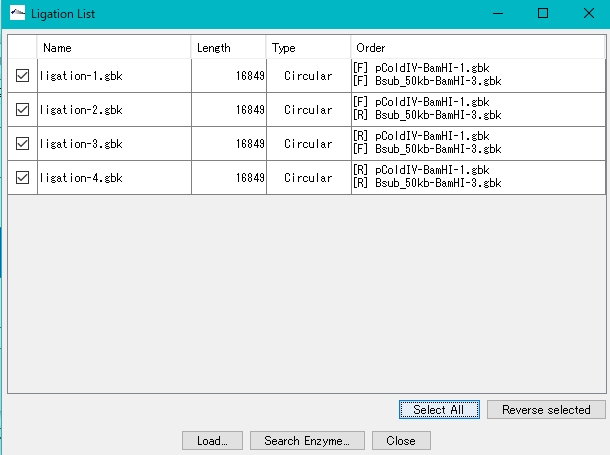
- Click Load.
- A confirmation message is displayed.
- Click OK.
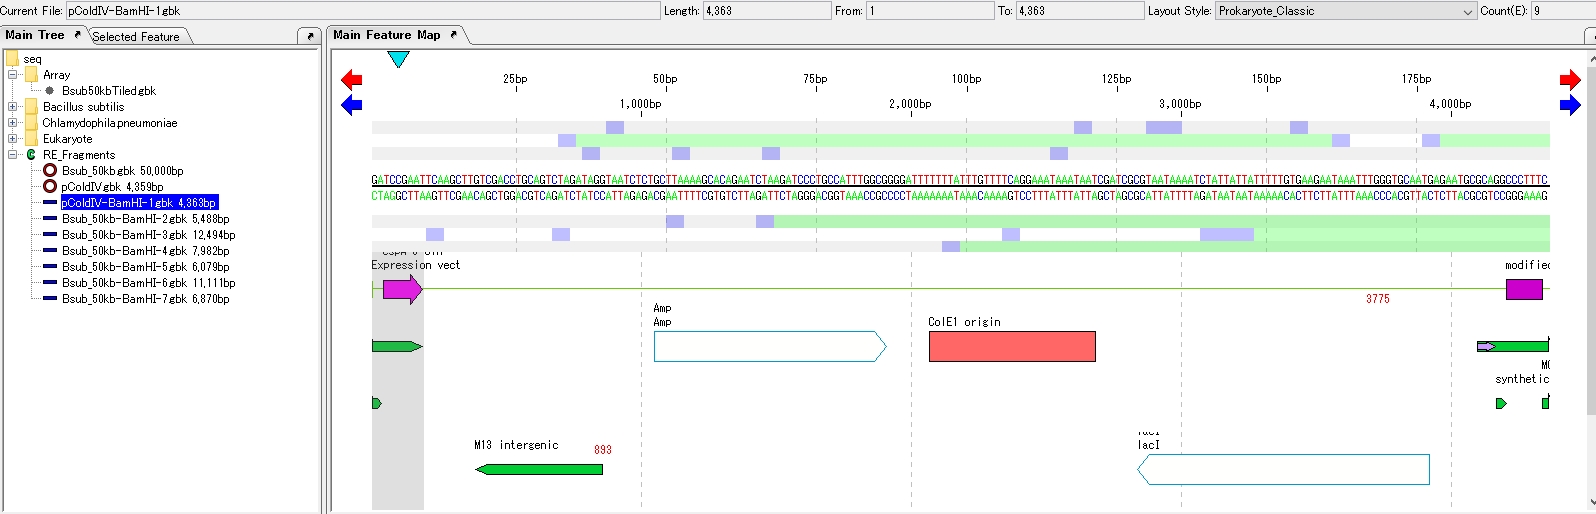
- The four ligation product sequences are loaded in the main directory.
- Close the Ligation List.
- Close the Ligation dialog.
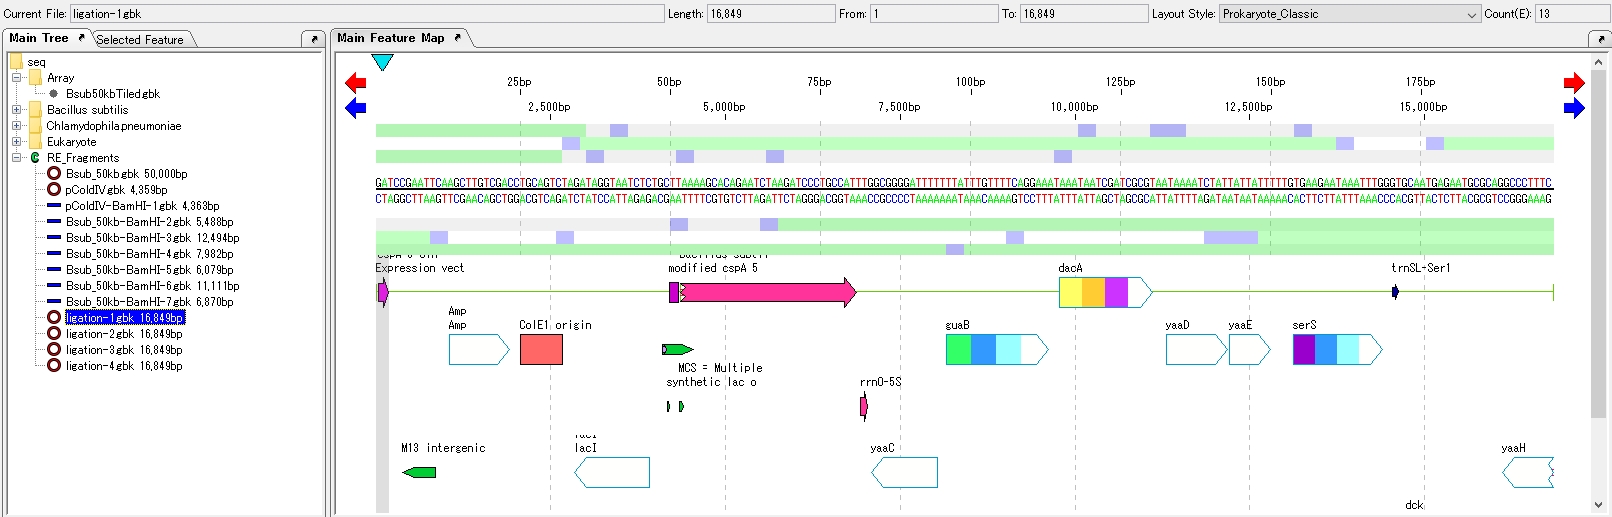
- Click on one of the Ligation product sequences to display it in the feature map.
Draw the plasmid map of the inserted plasmid.
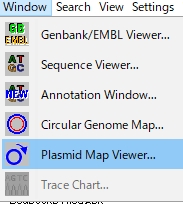
- Click Window -> Plasmid Map Viewer… from the menu.
- A confirmation message is displayed.
- Click Yes.
- The Select Insert DNA dialog is displayed.
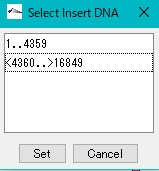
- Select the inserted fragment.
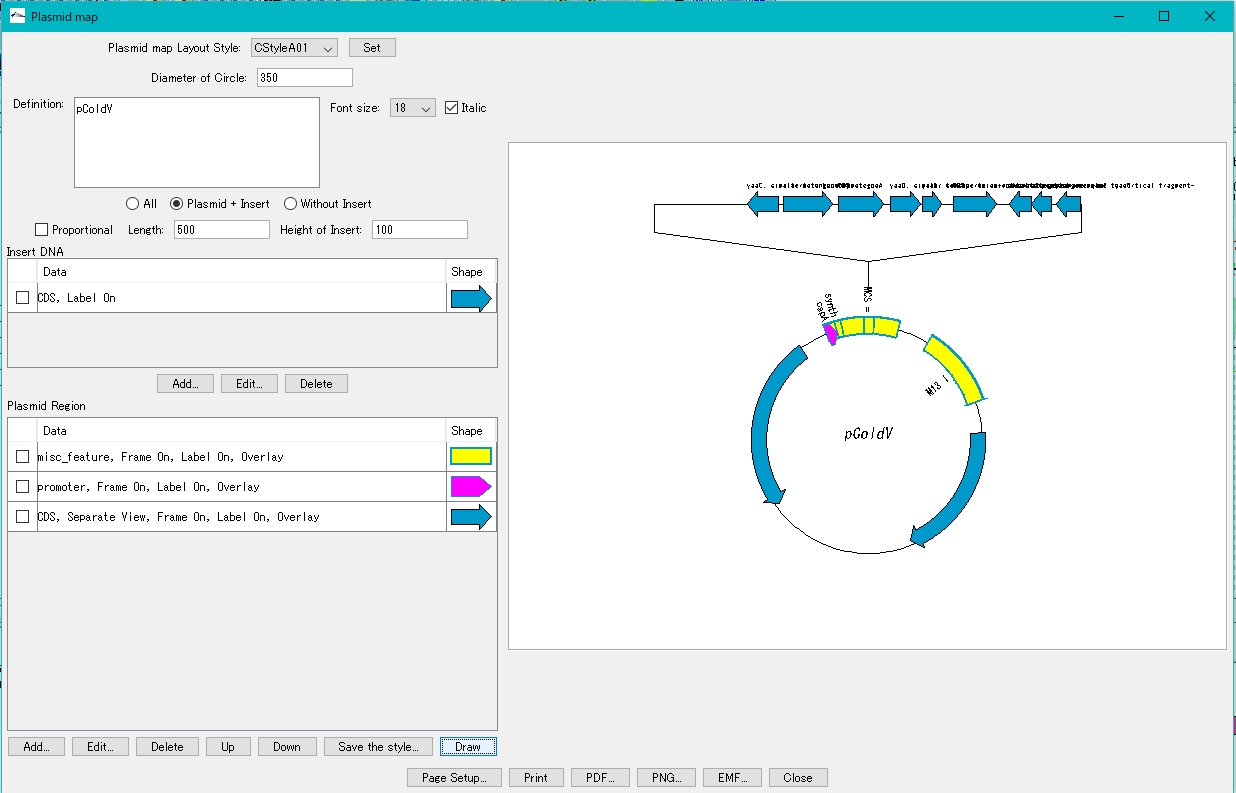
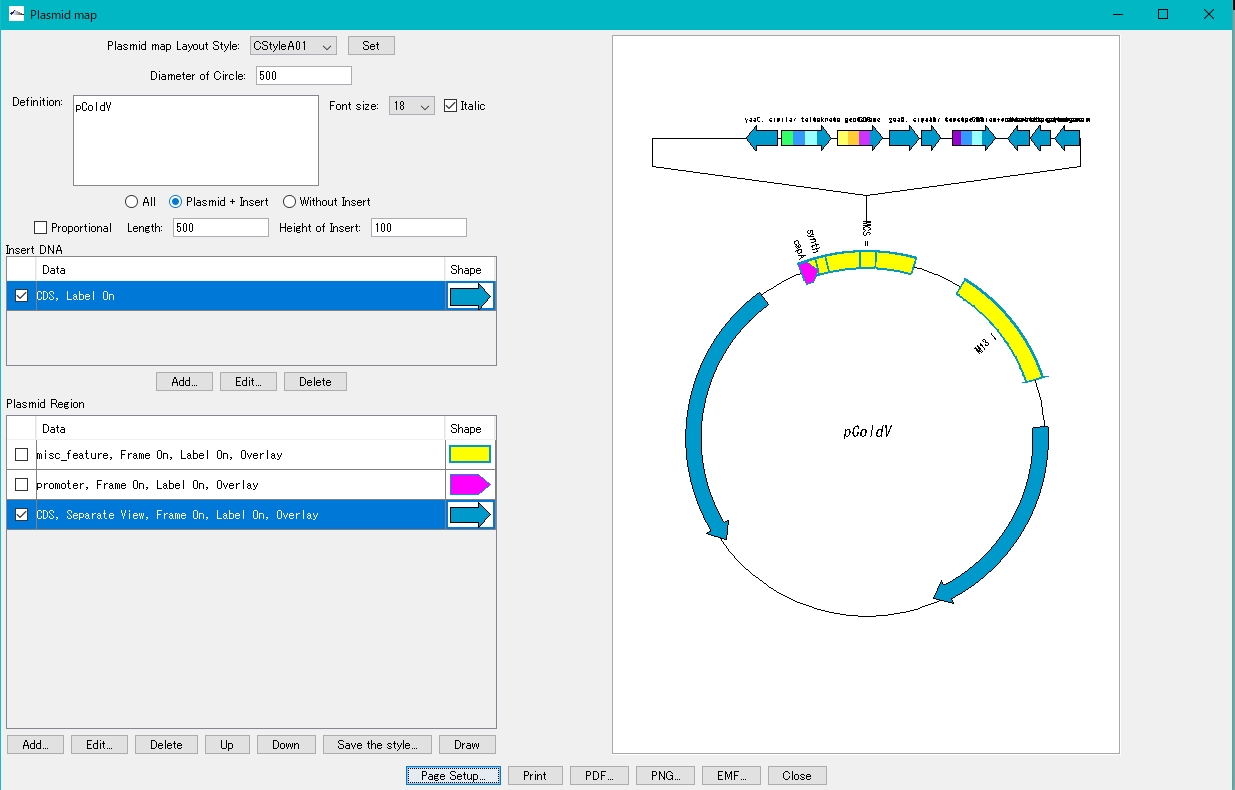
- The plasmid map drawing dialog is displayed.
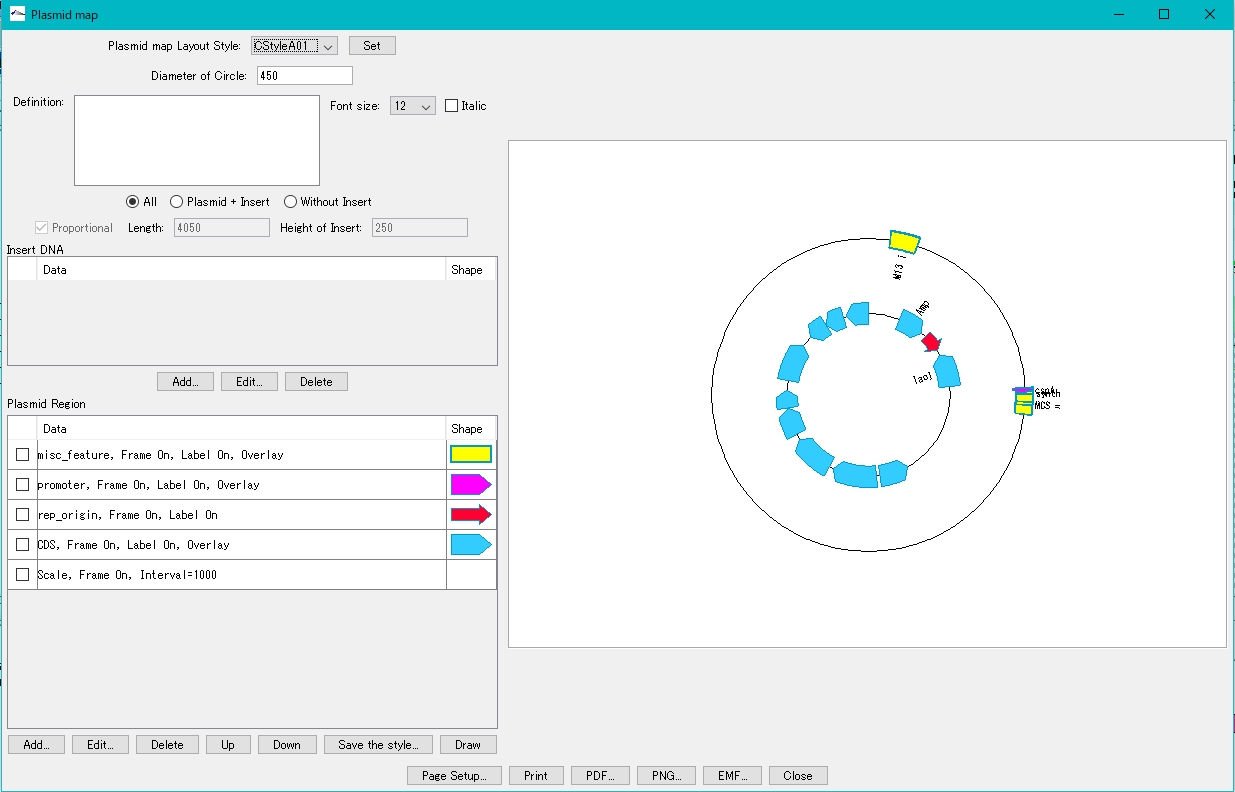
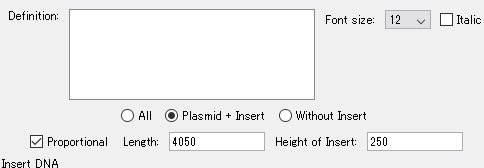
- Turn on "Plasmid + Insert".
- Click Add in the Insert DNA column.
- The Plasmid Map Lane Style Setting dialog is displayed.
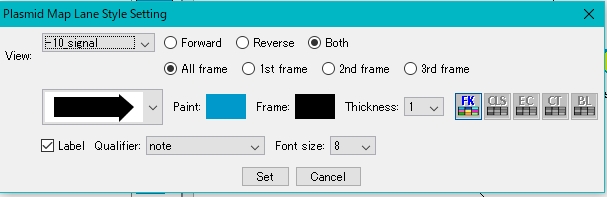
- Select the feature key to display.
- For this example, select CDS.
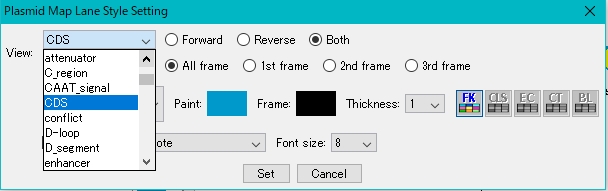
- Click Set.
- Click Draw.
- On the canvas on the right, the plasmid map with the insert blown out is displayed.
How to adjust drawing of plasmid map
If the insert display area extends above the canvas
Increase the page size or make it vertical.
- Click Page Setup…
- The page setup dialog is displayed.
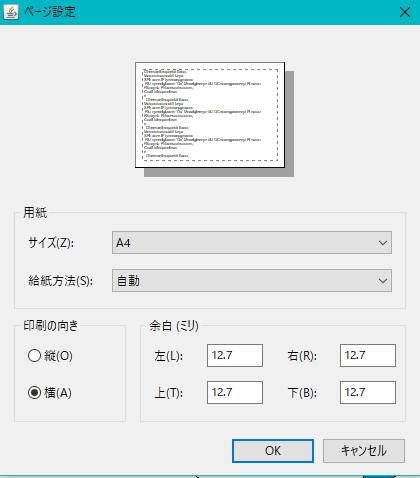
- Set the print orientation to "portrait". Alternatively, increase the paper size.
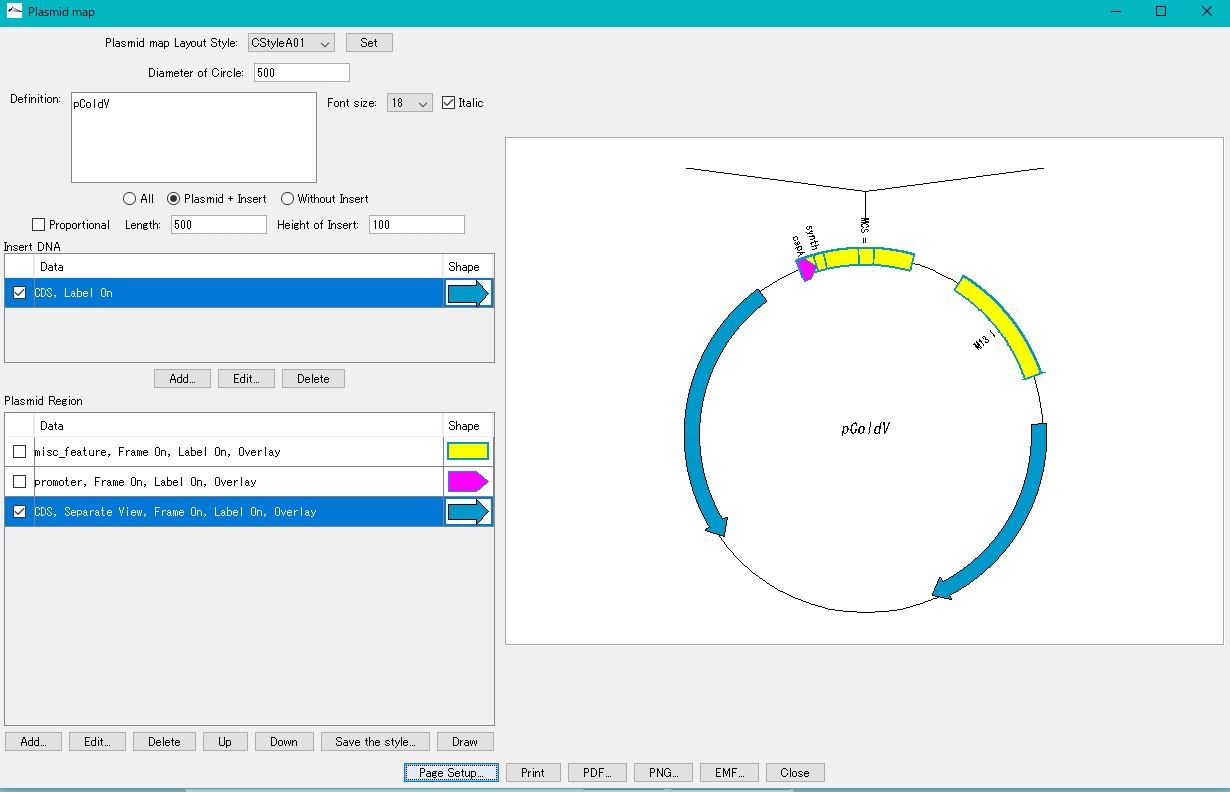
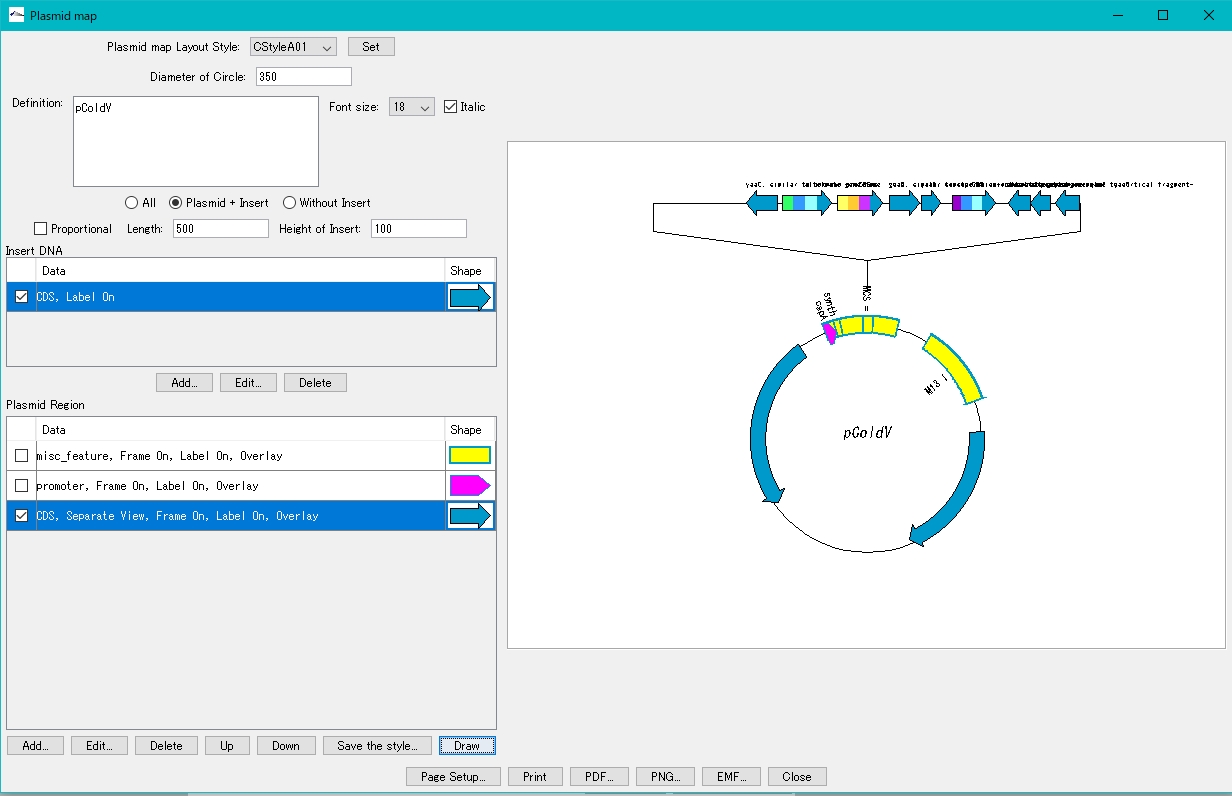
Reduce the radius of the annular area.
- Change Diameter of Circle to a smaller value.
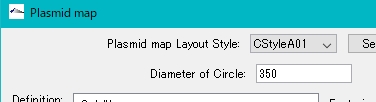
- Click Draw.
When the insert display area extends to the left or right of the canvas
Increase the page size or set it to the side.
- Click Page Setup…
- The page setup dialog is displayed.
- Set the print orientation to "landscape". Alternatively, increase the paper size.
Change the size of the insert area.
- Change the values for Length and Height of Insert.
- Click Draw.